Tortillaaaaaaa! For those not in the know, the way to say it is Tor-ti-ya. The first tortilla I knew was tortilla española when I first learn the Spanish language in university as a short elective course way back in 2002. The teacher gave us the recipe of tortilla española to fill in the blanks with 'imperativos'. I tried to make it and it was delicious. My dad loves it as he likes anything with potatoes and eggs. Oh maybe I should make it again and put it in this blog too...
However, after graduation, I was trying to not let my spanish go rusty and make friends with some Spanish speakers on the net via a language chat. They tried to learn English and I tried to learn Spanish. (well guess what, they were successful in English but my Spanish is still the same hahahahahaha! ah well...)....Most, if not all Spanish speakers that I found that time are Mexican and not Spaniards...thus my fondness towards Mexico and Mexican food and culture instead of Spanish....hehe
Anyway, this tortilla in this posting is Mexican tortilla and nothing like the Spanish omelette (tortilla española) but more like Indian chapati. Yes, it is just a simple flat bread, very simple that you just basically need water, flour and oil to make it :P But well, as always, I did research before making something and so I tried this recipe from Allrecipes.com called Tortillas-II.
Of course the original tortilla in Mexico used a special corn flour (no not the corn starch we have in here) called masa harina and I believe they will taste better and more corn-nish with that flour. Maybe I should try to get my mexican friends to give me some the next time they post stuff to me hehehehehe.
Ok so here's the recipe:
taken from: http://allrecipes.com/
Ingredients
Directions
OK, so that was obviously copy-and-pasted from allrecipes page but well I will try, in this blog, to share some personal touch or changes that I made during making the recipes that I will post here in this blog. But frankly, as I mentioned in my earlier post, I am not a true cook and usually I followed recipe I found to the T :P and in this case too, as I haven't made any tortilla before, I followed it exactly. but I'll try to point out if I did something different or add certain gesture or stuff, ok? Now, let me see...this tortilla was made on December 26, 2009 (no I did not remembered that in my head, I got the dates in my facebook :P), so now I have to make a crazy reflection way back to 2009...haha..ah well, I'll try my best. I follow the directions as in recipe...even use a ruler to measure the 7 inchess diameter lol! It's true! haha

here in this picture is the only round tortilla I got that time. For first timer, don't worry about getting a circle. This one was just luck...my other pieces was really in variety of shapes and my Mexican friends said even she didn't get the circle often...only her abuelo(granny) or mama got it round. In other words, only old people will get their tortillas round..hahahahahhaha!
and so while u roll this, you should already have your skillet or pan heated pretty hot coz we want the tortilla to cook nicely. When I made this, mine got 'hard' and chewy pretty fast and it was not nice to bite into (it's not crispy but 'hard-and-chewy' so my mexican friend's mom said, I just need to flip it once when it bubbles or it will go hard (like mine).
What she meant is this, first after rolling, put your flat dough on the properly heated skillet, then wait for it to 'bubble'...the dough will be inflated in some areas. (those who are expert or used to making chapatti will know this, it's the same science!). When u see the sign, flip it to the other side and it will want to inflate again...then you take off your tortilla off the heat.
While rolling and cooking other pieces, put the cook ones under a dry kitchen towel so it will stay warm and soft...

This was the nice round one that I showed earlier...it became superstar for my photography coz it's the only one that looked ok...

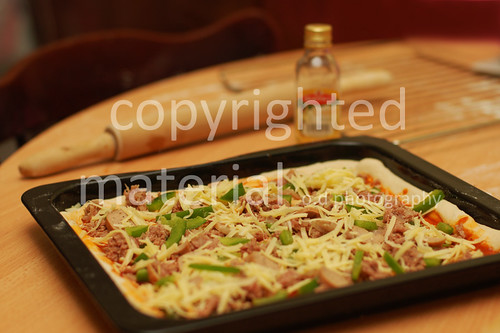
And so that's just the flat bread called tortilla...Mexican use this as we Malaysian eat rice. Eat it with anything. Cut it up to smaller pieces and put it in the oven until dry to make nachos and eat it with guacamole, wrap some beef and whatever with it to make Frajitas or Burritos. I don't know the differences, lol, don't ask me...but my friend said what I made here, with that kind of wrap style is called Burritos.
Now how do you make it into Burritos? Let's assemble it!!
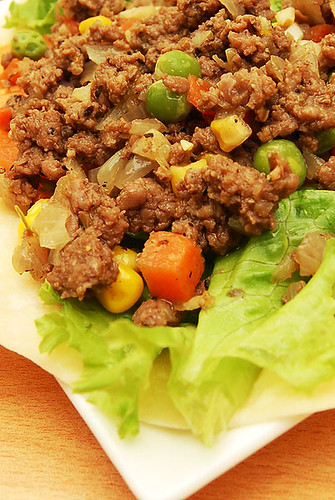
For the meat, no specific recipe that I followed...I simply sauteed some onions and garlic, dash some oregano and rosemary in, seasoned it with ground black pepper, add in the minced beef and finally mixed vege...and oh yeah, salt to taste.
That's how it looked like...mmmmmmm.....
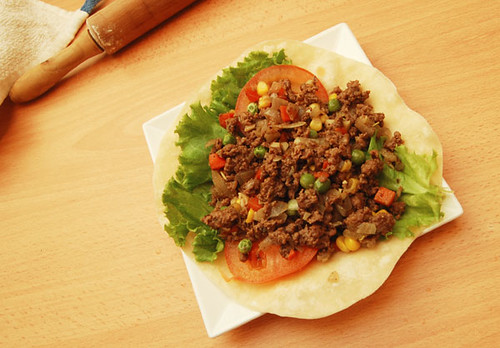
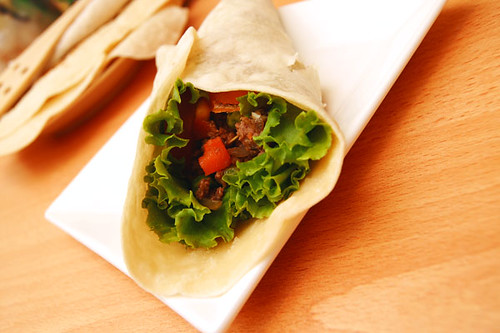
1. lay your tortilla....

2. Put some salad and tomatoes like this....

3. Put some of the beef filling that you made

u see that? No? ok try this:
4. Wrap it up. I used a toothpick to secure the join.

And here you go...Burritos...
My review, well the tortilla was just a simple flat bread, nothing special...as for me as Malaysian, I like chapatti texture more, it is softer and more pliable with Atta flour I guess...but that could due to my bad technique in making tortilla. Well, in making chapatti, you have to knead the flour which forms the gluten to make it pliable, no kneading here...that could be it too? Whatever it is, tried it at least once I would say...no harm done, and feel Mexican along the way...Adios!